After Apple introduced Swift programming language for iOS development, it has covered most of the iOS development market. It is very easy to develop in iOS with Swift when compared to Objective-C. There are a lot of features in swift which is really important in iOS development.
Let’s have a look at 5 important elements that are really helpful for an iOS Developer while developing an app using swift.
1. Closures
As a beginner like most, I also wrote code in a single function or block and which led me to a complex function that is really hard to read and understand. Then I got to know about Closures which helped me made my coding easy and clear.
Closures are a kind of function or block that doesn’t contain the “func” keyword at the start. It’s a self-contained block that can be passed around and used in code. Closure can contain some operation and can be passed as a variable.
Here you can see the general form of closure syntax:
					{ (parameters) -> (return type) in
        (statements)
    }
If you are an iOS developer I think you may have seen these words completion handlers. These completion handlers are the implementation of closures. Closures are very effective to handle calls in an asynchronous process.
Let’s take an example of an additional function where we need to pass the value “a” and the other value is stored in local storage or on a remote database. In this case, if you use the return statement, it won’t wait for completing the process of data fetching, so that closure will help us here.
					func addValue(a: Int, result: ((Int) -> Void)) {
     fetchValueFromServer() {(b) in
        let value = a + b;
        result(value);
    }
}
In the above function, we have declared the result as closure type which handles the result after the addition and returns the results at the desired place. That’s how we can handle the result-
					console.log( 'Code is PoetryaddValue(a: 2) { (sum) in
    print("Sum is ", sum)
}
The result will be according to the stored value, if the stored value is “3” then it will wait for the fetching process to complete, then call the result block so the result will be printed Sum is 5 Closure can help us in handling API calls, fetching data from local storage, and also handling some activities from XIB or separate classes.
2. Protocol
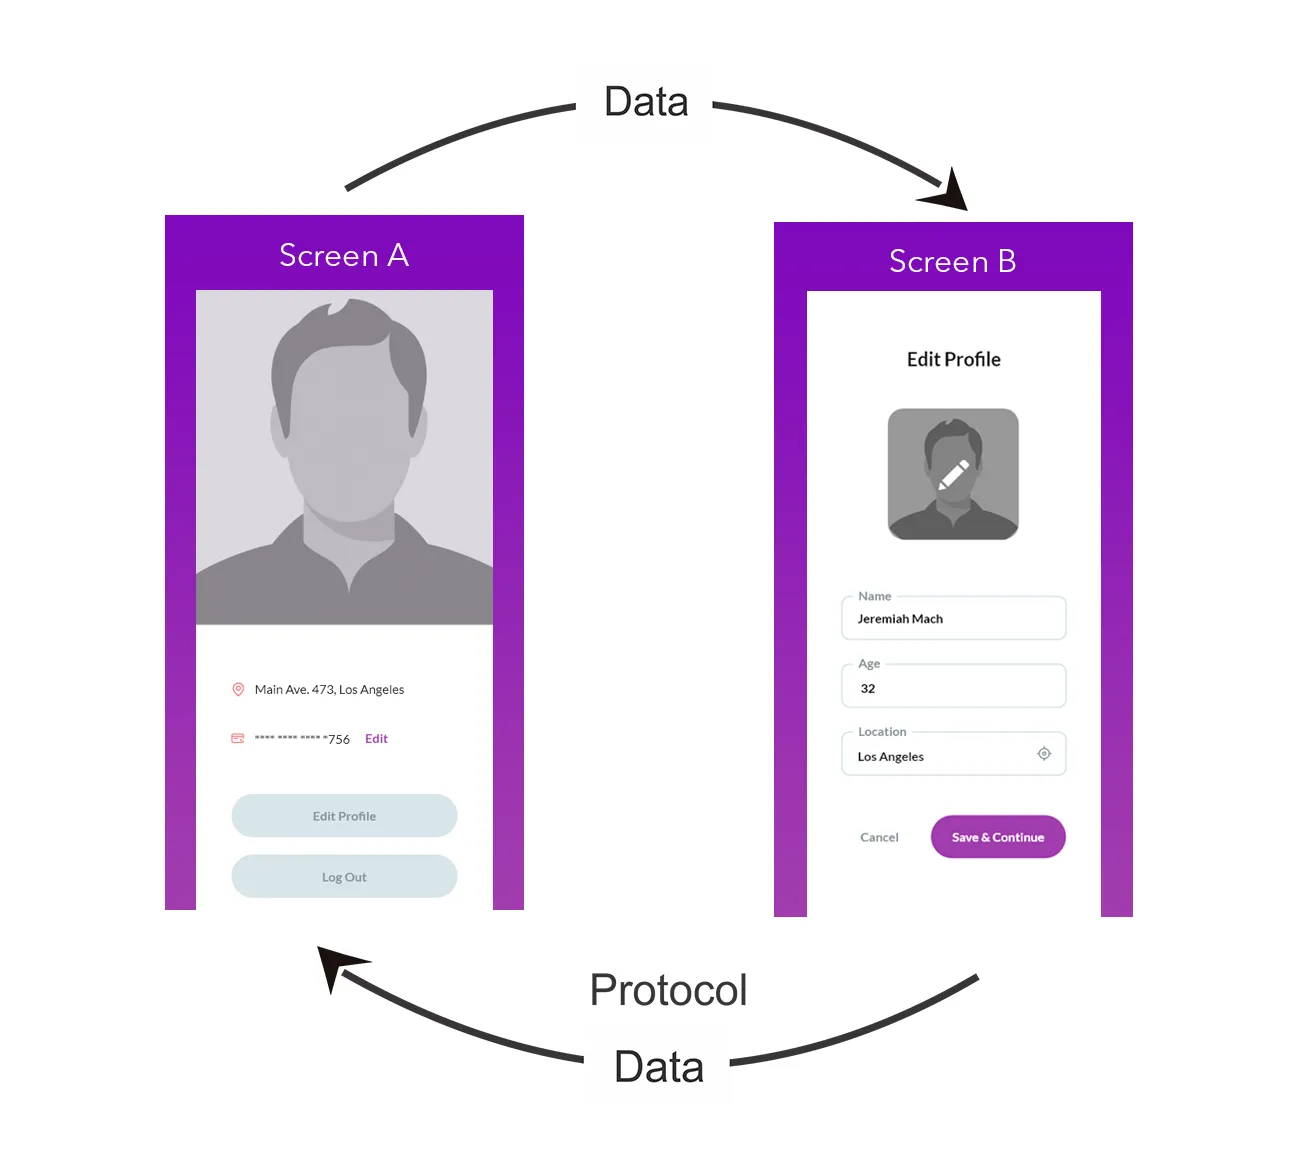
Protocols are one of the ways of transmitting data and instructions from one to another place in Swift. For an easy example let’s say we have two screens A and screen B. We have moved from screen A to screen B, and now we want to notify screen A whenever we take any action on screen B, here comes the use of a protocol. Using this we can easily transfer data and can notify other classes and screens from other places.
					Here is a basic example of protocol:

protocol DemoProtocol {
    func didReceiveData(data: Any)
}
					class ClassA: NSObject {

    var delegate: DemoProtocol? = nil

    override init() {
        super.init()

        if delegate != nil {
            delegate?.didReceiveData(data: "Hey! It's from ScreenA")
        }
    }
}
Now let’s use this in ClassB where we’ll get the data using protocol.
					class ClassB: NSObject, DemoProtocol{

    var classA = ClassA()
    override init() {
        super.init()
        classA.delegate = self
    }

    func didReceiveData(data: Any) {
         // here we'll get data sent from ClassA
    }
}
3. NotificationCenter
NotificationCenter is also a way of transmitting and receiving data and instructions from one place to another. Using NotificationCenter we can declare notification observer at one place and we can post data on that notification from multiple places.
We can use multiple Notification observers and for each, we need to provide an NSNotification.Name and it should be unique for each of them. In easy words, at the time of declaration, we provide an NSNotification.Name to the observer and for handling data, we need to connect it with a selector. Following we have declared an observer in a class.
					class Foo: NSObject {

    override init() {
        super.init()

        NotificationCenter.default.addObserver(self, selector: #selector(onNotificationFired(notification:)), name: NSNotification.Name("SendSomeData"), object: nil)
    }

    @objc func onNotificationFired(notification:Notification) {
        //we can fetch our data from notification.userInfo
    }
}
NotificationCenter.default.post(name: NSNotification.Name("SendSomeData"), object: nil, userInfo: ["data":"Data sent via notification"])
4. Auto Layout with Visual Format Language (VFL)
As and iOS developer we love working over storyboard Interface Builder and we usually perform auto-layout operations using storyboard. But in some cases we need to create and align elements at runtime. So at that time we auto-layout programmatically. Programmatically adding constraints one by one for a view is quite time-consuming.
Here Visual Format language comes into work for the convenient way of doing this. Visual Format is basically some String formations that work as constraints. The Auto Layout Visual Format Language (VFL) allows you to define constraints by using an ASCII-art formatted string. Basic Visual Format layout pattern is like:
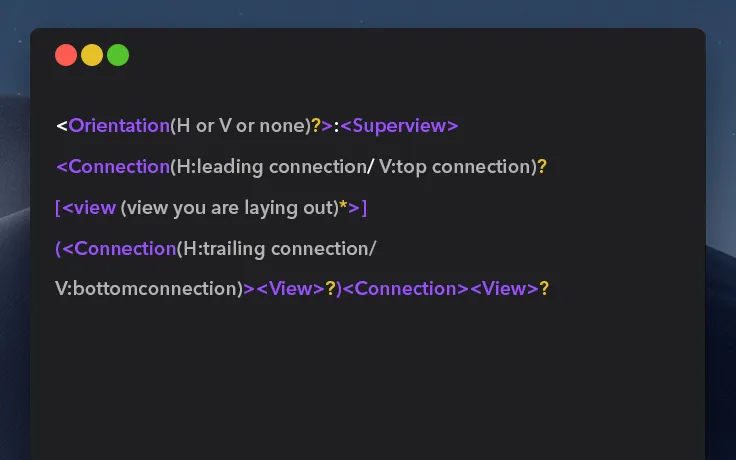
Here is a more detailed and well-written blog about Auto Layout Visual Formatting Language.
5. Extensions
Extensions are used to add extra functionality to any class, structure, enumeration, or protocol. Extensions can be used in any file to add new functionality.
Extensions can be used to:
- Add computed instance properties and computed type properties
- Define instance methods and type methods
- Provide new initializers
- Define subscripts
- Define and use new nested types
- Make an existing type conform to a protocol
Let’s take a simple example: We want to add some fixed styling to any view at multiple places so we can use an extension to reduce our code and time both. Here is how you can declare and use the extension :
					extension UIView {
    func makeItRoundedGreen() {
        self.backgroundColor = .green
        self.layer.cornerRadius = self.frame.height/2
    }
}
The above code has declared a function using extension so now we can easily use this function anywhere on Views. This can be used like:
					override func viewDidLoad() {
     super.viewDidLoad()
     let myView = UIView()
     myView.makeItRoundedGreen()
}
used like:

override func viewDidLoad() {
     super.viewDidLoad()
     let myView = UIView()
     myView.makeItRoundedGreen()
}
You can also visit the official site of Swift for the Extensions and other details related to Swift.
These are some really important elements if you are working with iOS development. Hope! you enjoyed reading and these will help you in your work and knowledge.
I’ll be back with some more interesting knowledge sharing.
Thanks.
Any doubts?
Drop your questions here.


 (1)")