
Improve your React JS Developer skills?
Whether you are an employer or an employee, you must have a certain skill that will help you to give the best in your role. Here I’m sharing some top learning React JS tips that will help you to grow your knowledge as well as your skills as a React JS Developer.

Tips for React JS Developers
1. Keep the components small
When we talk about good developers they know that small modules, classes, or anything is much easier to understand and maintain, the same we can do with React components. The size of your component depends upon many different factors, but as per me, your components should be smaller than you think. Let’s see an example:
					const InterestingFacts = props => (
  <div>
    <h1>Interesting Facts</h1>
    <div>
      { props.facts.map(fact => <Fact key={fact.slug} fact={fact}/>) }
    </div>
  </div>
);
2. Use functional components
					function ShowName(props) {
   return <div>Welcome {props.name}!</div>
}
The same component written in ES6:
const ShowName = ({name}) => <div>Welcome {name}!</div>
					class ShowName extends Component {
   render() {
      return <div>Welcome {this.props.name}!</div>
   }
}
3. Hooks
Use Hooks with the release of v16.8.0. Hooks provide us to use react features without writing a class, i.e. hooks will not work inside classes. In addition, It provides a more direct API to the react concepts we already know, like props, state, context, refs, and lifecycle. We can also create our own hooks in React JS. Let’s see below the use of useState and useEffect.
a. useState
We can use the React state feature in the functional component with useState. It returns two values: the current state and a function to update it. We can also set the default (initial) state value. We have to write like this: const [isVisible, setIsVisible] = useState(false). In class, this is similar to this.state.isVisible and this.setState.
					import React, { useState } from 'react';

export default function ExampleComponent() {
    const [isVisible, setIsVisible] = useState(false);

    return (
        <div>
            { isVisible && <h1>Bumper offer!</h1> }
            <button onClick={setIsVisible(true)}></button>
        </div>
    );
}
b. useEffect
We can use some React lifecycles in the functional component with useEffect.
import React, { useState, useEffect } from 'react';

export default function ExampleComponent() {
    const [isVisible, setIsVisible] = useState(false);
    const [offerText, setOfferText] = useState('No offer!');

    // Similar to componentDidMount and componentDidUpdate:
    useEffect(() => {
        // Update the offer text
        !isVisible && setOfferText('Bumper offer!');
    }, [isVisible]);

    return (
        <div>
            <h1>{offerText}</h1>
            <button onClick={setIsVisible(true)}></button>
        </div>
    );
}
4. Always use PropTypes
PropTypes, one of the most important tips for React Js developer, provide us with more type checking/safety of our components. It exports a range of validators that can be used to check whether the received data is valid or not. When in development (not production), if any component is not given a required prop, or is given the wrong type for one of its props, then React will log an error to let you know.
					import React from 'react';
import PropTypes from 'prop-types';

export default function MainButton({ className, title, onClick, isLoading }) {
    return (
        <button
            type="button"
            className={`main-button ${className}`}
            onClick={() => onClick()}
        >{isLoading ? <><i class="fas fa-spinner"></i> {title}</> : title}</button>
    );
}

MainButton.propTypes = {
    className: PropTypes.string,
    title: PropTypes.string.isRequired,
    onClick: PropTypes.func,
    isLoading: PropTypes.bool,
};
5. DefaultProps
					export default function MainButton({ className, title, onClick, isLoading }) {
    return (
        <button
            type="button"
            className={`main-button ${className}`}
            onClick={() => onClick()}
        >{isLoading ? <><i class="fas fa-spinner"></i> {title}</> : title}</button>
    );
}

MainButton.defaultProps = {
    className: '',
    title: 'Submit',
    isLoading: false,
};
6. React Fragment
Sometimes we need a wrap the children elements in a single element but we don’t need any extra DOM element. So using React.Fragment component we can return multiple elements in a render() method without creating an additional DOM element.
					render() {
  return (
    <Fragment>
      Some text.
      <h2>A heading</h2>
    </Fragment>
  );
}
7. High Order Component
					const Reverse = (PassedComponent) =>
  ({ children, ...props }) =>
    <PassedComponent {...props}>
      {children.split("").reverse().join("")}
    </PassedComponent>

const name = (props) => <span>{props.children}</span>
const ReversedName = Reverse(name)
<ReversedName>Hello</ReversedName>
8. Memoizing
const memoizedValue = useMemo(() => computeExpensiveValue(a, b), [a, b]);
9. React with TypeScript
					import * as React from 'react';

const ExampleComponent: React.FunctionComponent<{
  name: string
}> = (props) => {
  return <h1>{props.name}</h1>
}

export default ExampleComponent;
					interface Props {
  name: string
}

const ExampleComponent: React.FunctionComponent<Props> = (props) => {
  return <h1>{props.name}</h1>
}
10. React Developer Tools
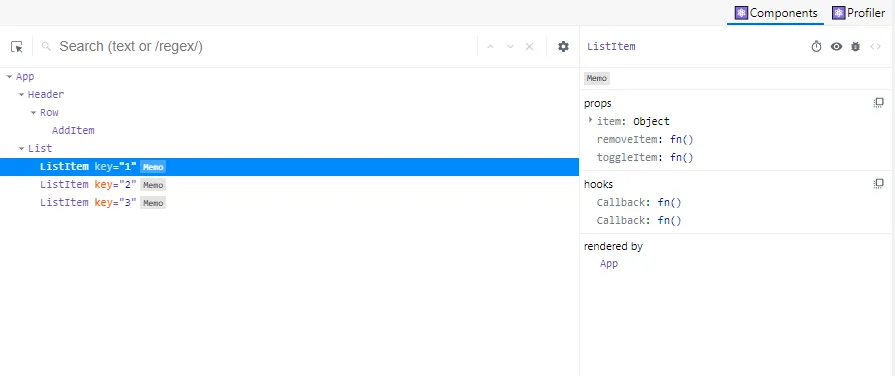
I hope all these tips will be useful for you. I will try to bring more similar concepts in the next article. Please feel free to ask in comment if you have something to add in this list or having any doubt or need more insights on particular point from above? please drop a comment. Thank you for reading.
–Nitesh Gour
I hope I could help you with these tips and with these React tips you may do some wonders. If you have any query feel free to comment or connect with us through our website.


 (1)")